Arduino Pseudo Random Numbers [Guide + Code]
In this video we demonstrate how to create pseudo random numbers with Arduino – with a useful twist.
This lesson was inspired by the following viewer question:
How do I create Random Non-Consecutive numbers with Arduino?
P.S. These are the best tutorials that a complete idiot like you could ever make, thanks.
-Chris
Let’s overview exactly what we will talk about in today’s episode:
- Talk about pseudo random numbers.
- Identify the problem – using an Arduino sketch to demonstrate.
- Discuss how we might solve the problem.
- Write an Arduino sketch that solves the problem.
- Review what we talked about.
Pseudo Random Numbers
Before we answer the viewer’s question it is important to talk about what a pseudo random number is.
A purely random number in the mathematical sense can’t be predicted. The microcontroller that the Arduino uses (and for that case, most computers in general) can’t really create pure random numbers.
What they create instead are called pseudo random numbers. These are numbers that appear to be randomly generated, but if studied over time a predictable pattern emerges.

The bottom line is that the random numbers we create with Arduino can be predicted.
Now there are clever ways to create pseudo random numbers that act like the real deal – you can learn about one method in our video tutorial talking all about random numbers – but for this discussion, let’s return to our viewers inquiry.
Identify the Viewer’s Problem – use an Arduino sketch to demonstrate.
Ok, so let’s go back to the viewers question, he wants to generate random numbers, but he never wants the same number generated two times in a row.
Let’s write an Arduino Sketch to make this clear.
//This sketch outputs pseudo random integers.

//A variable to hold pseudo random integers.
int randomInt = 0;

void setup() {

  //Initiate serial communication.
  Serial.begin(9600);

}//Close setup function

void loop() {

  //Create a random number and assign it to the randomInt variable.
  randomInt = random(0, 10);

  //Send randomInt to the serial port for displaying on the serial monitor window.
  Serial.print(randomInt);

}//Close loop function.
In the first block of code a variable that will hold the pseudo random integers is declared and initialized.
//A variable to hold pseudo random integers.
int randomInt = 0;
In the setup() function we begin serial communication in order to display the numbers we generate on a computer display.
void setup() {

  //Initiate serial communication.
  Serial.begin(9600);

}//Close setup function
In the loop() we create the random number with the Arduino random() function and assign the output to the variable we had just created. The random() function can take two arguments 1) the minimum value of the number we want generated 2) the maximum value we want generated.
  //Create a random number and assign it to the randomInt variable.
  randomInt = random(0, 10);
I will use 0 for the minimum, and 10 for the maximum.
Every time through the loop, a new random number will be assigned the randomInt variable.
Finally, the value of randomInt is sent over the serial port to be displayed in the serial monitor window.
  //Send randomInt to the serial port for displaying on the serial monitor window.
  Serial.print(randomInt);
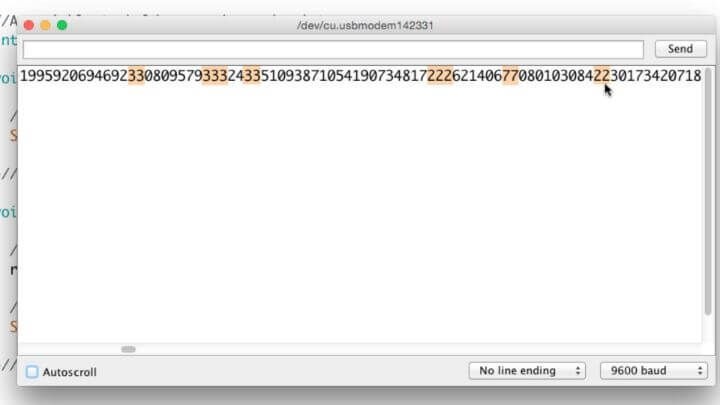
If you upload this code and open the serial monitor you will see in some cases where the same number shows up two times in a row.
This is the problem. The viewer doesn’t ever want the same number two times in a row.
Discuss how we might solve the problem.
So let’s talk about how we might solve this problem. We know we need to generate a random number.
What if we create a variable to track the previous random number?
Programming Electronics Academy members, check out the Arduino Course for Absolute Beginners to jump start your Arduino programming skills.
Not a member yet? Sign up here.
Then we could use a condition that says something like “If the previous random number is equal to the random number that was just generated, toss that number out the window, and create a different one.”
The final thing we would need to do is set the previous random number equal to the new random number, that way we keep updating our previous random number every time through the loop().
Let’s Implement our solution in an Arduino Sketch.
Copy and paste this code into your Arduino IDE. All you need is an Arduino board attached to your computer to make it work.
//This sketch outputs pseudo random non-consecutive integers.

//A variable to hold pseudo random non-consecutive integers.
int randomInt = 0;

//A variable to hold the previously assigned pseudo random non-consecutive integers.
int previousRandomInt = 0;

void setup() {

  //Initiate serial communication.
  Serial.begin(9600);

}//Close setup function

void loop() {

  //Create a random number and assign it to the randomInt variable.
  randomInt = random(0, 10);

  /*Check if the random number is the same as the previous random number.
  If it is, then reassign a new random number until it is different from the previously set one.*/
  while (randomInt == previousRandomInt) {

    //Create a random number and assign it to the randomInt variable.
    randomInt = random(0, 10);

    //When a consecutive random number has been identified, indicate it.
    Serial.print("X");

  }//close while statement

  //Set previousRandomInt equal to the current randomInt.
  previousRandomInt = randomInt;

  //Send randomInt to the serial port for displaying on the serial monitor window.
  Serial.print(randomInt);

}//Close loop function.
If you upload this code to your Arduino and open the serial monitor window you will see the numbers scrolling across the serial monitor window, but now you will not witness any duplicates side-by-side. You may notice some X’s intermittently between the numbers, this is where the Arduino sketch identified a duplicate random number and generated a replacement.

If you look through the code, you will see this is accomplished with a While Statement.
I hope you can find some application for this simple process of creating a pseudo random non-consecutive number with Arduino. Let me know what you think the comments!


oops. The last set of code has some issues. The most confusing is that you have:
Serial.println();
instead of:
Serial.print (“X”).
Using the serial.println also makes it easier to read the numbers, but now we get some reeeeeealy large numbers per line. So…I am a wee bit confused…
Hi Christopher, Thanks for the comment!
The goal here was to create an output of “Random Non-Consecutive numbers” between 0 and 9. Though, I think the title is a bit of misnomer maybe?
What the viewer had wanted was an output that never repeated the same random number twice in a row, for example 2,1,2 would be ok, but 2,2,1 would not be ok.
For demonstrations sake, I use the println() to show when the function random(0, 10) would have displayed a repeating number.
I hope this helps some!
Got it, however the code that you posted to copy doesn’t match up with the code you highlighted to show the “X”.
My confusion stems from that typo.
Also, when I do run the code with the corrected Serial.println(“X”); I get some numbers like:
05946362x
x
348987012x
x
6x
02514212856216263x
61409712x
498x
x
7x
1596080597073540x
5139182
Now, yes, they do not repeat, but why are they not between 0 and 10 ?
Aha – I see the error of my ways now. Sorry about that. I added the “X” back in the code, and changed the println() to a print(), as it was in the video – so stuff should line up now.
For the second part of your question. The longer numbers are just the numbers 0 through 10, being shown on the serial monitor one after another as they are created in the program – so just they look like a big number. The only time it goes to the next line is when that while loop kicks in, and it prints the x.
Thanks again for your comments!